


4. Data filters
This lesson covers working with data filters.
A data filter makes it easy to search through data files.
Data filters are particularly useful with large data files such as a customer database.
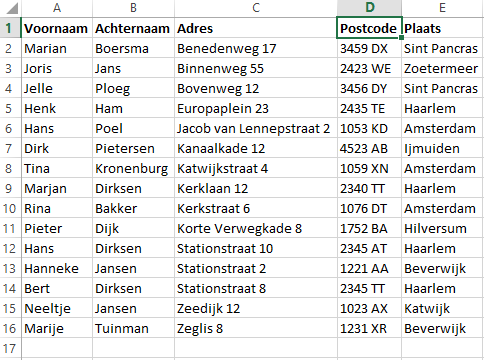
The file Klanten is used for this lesson.
Here you can download the file Customers download.
The file can then be saved on your own computer. For example in "My Documents".
Open the file Klanten
Click the File tab and use the Open button to open the Klanten file you have just saved.
Figure 4.1 The Klanten file
The formatting
First we will add formatting to the table so that it looks neat.
Click the Home tab if it is not already active.
Figure 4.2 Home tab
Data filters can then be added to the table by clicking the "Format as Table" button.

A list of formats opens.
Choose a format.
Figure 4.3 Choose a format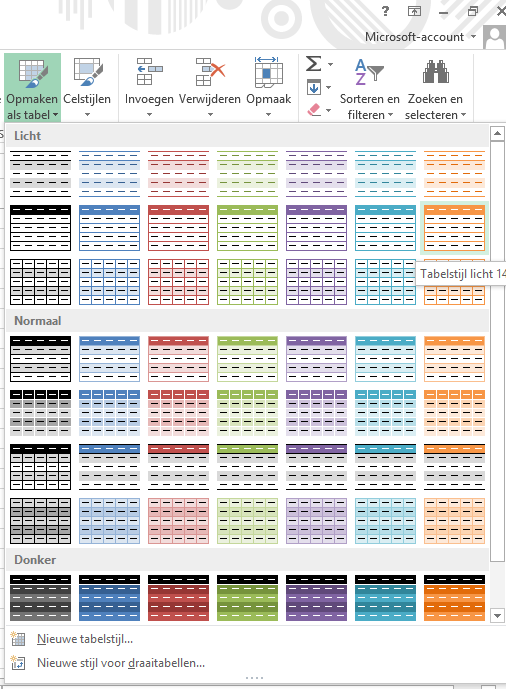
Figure 4.4 Check that the table is selected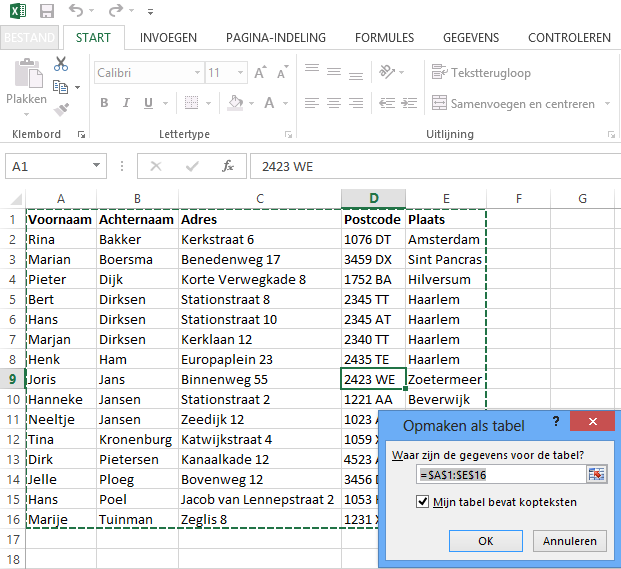
Check that the table has been selected correctly.
If all has gone well, the Format as Table window shows: =$A$1:$E$16
Click OK.
The result
Figure 4.5 Customer database with data filters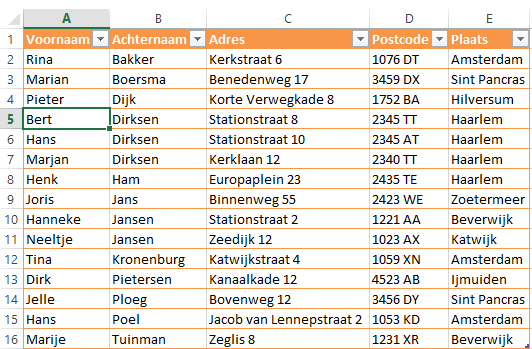
Working with the data filter
In the previous exercise we added formatting and a data filter to the table.
In this exercise we are going to work with the data filter.
The formatting and the data filter have been added to the table.
The filter is visible in the row with the column headings.
Figure 4.6 The data filter
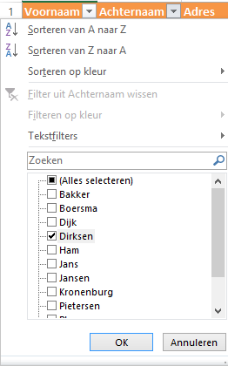
Click the arrow next to Achternaam
Figure 4.7 Setting a filter for Surname

Untick the (Select All) checkbox.
Tick the box next to Dirksen.
Figure 4.8 Select the desired filter
The result of the filter
Figure 4.9 Filter result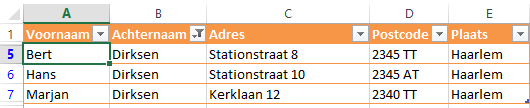
There is now a small button with a filter icon next to Surname. This means that the Surname field has been filtered.
Click the button next to Achternaam again.
Select the option (Select All)
All customers are visible again.
Make a list of everyone from Hilversum or Amsterdam.
The result
Figure 4.10 Result of filtering on all people from Hilversum or Amsterdam
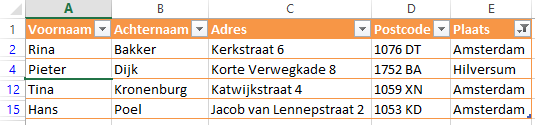
Solution:
You filter on Hilversum and Amsterdam by clicking the arrow next to City.
Make sure that only Hilversum and Amsterdam are ticked.
