


3. Adding text
A logical next step when creating a website is adding content. In this chapter we will limit ourselves to adding a paragraph of text and a corresponding title.
3.1 A title
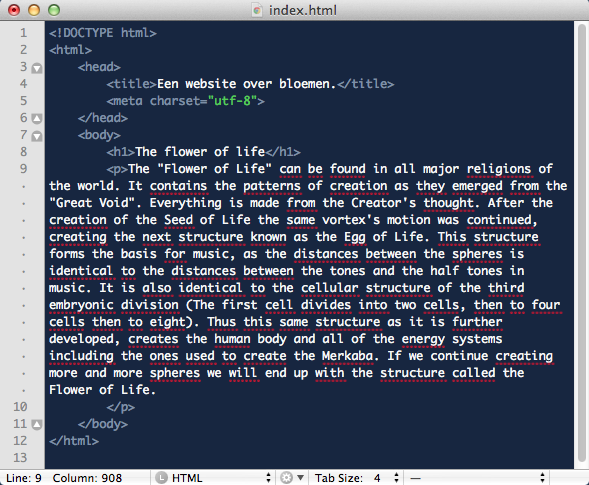
A title is placed above a paragraph as follows. Within the body container in the HTML code, you place the following code <h1>The flower of life</h1>. The h1 tag ensures that the text in the h1 container is regarded as a title (the h in this tag stands for header). Just as the h1 container is intended for a chapter title, you can use the h2 tag for a subsection of that chapter. Ultimately, you can add subsections down to the level of h6.
3.2 A paragraph
Placing the paragraph of text below our newly created title works in a similar way to the title. The only difference is that this time you do not use the h1 tag but the p tag (the p stands for paragraph). So place this <p>...</p> container beneath the title. You can replace the three dots with this interesting text.
The end result will look roughly like the image below. You can also copy the tabs used to indent the lines to make the code more readable, but this is not compulsory.
3.2 View the result in a browser
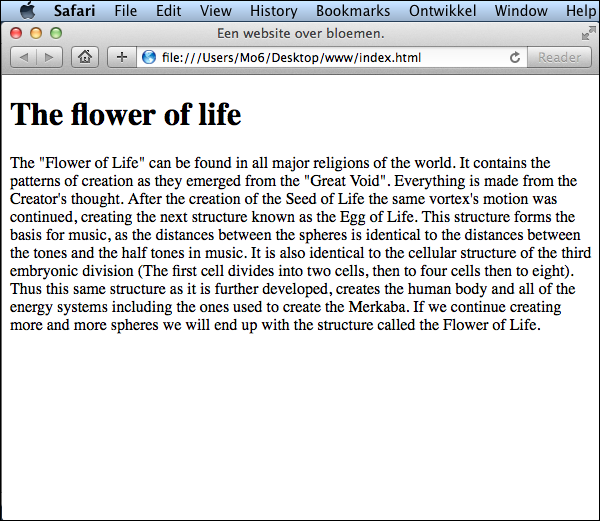
At the end of this chapter, the moment has come to admire your efforts. The index.html file you have written in the text editor can be viewed in your browser. To do so, open the website folder on the desktop and double-click the index.html file to open it with your favourite browser. The image below shows the result.
Tip: if you make a change to the code, you must first save the code before pressing the refresh button (or the F5 key on your keyboard) in your browser in order to actually see the changes.